I’ve been following online posts regarding sewing room organization for a while. I recently upgraded my storage, but still hadn’t found a solution for storing my current projects, nor had I tackled the issue of
THE IRONING BOARD
I went out looking for rolling carts to store my baskets/bins of current projects. Lucky for me, the original solution I found was out of stock. That is when I looked at all of the wasted space under my ironing board, and decided I could upgrade my ironing station and create additional storage at the same time. I didn’t have to look far for inspiration. Someone on Pinterest had done something similar in their laundry room, but hadn’t changed it for a sewing space.
My new ironing station needed these characteristics:
Large rectangular board
capable of handling an unfolded width of standard fabric
no pointed end
Open Cubby Space
capable of fitting my favorite storage baskets
(Sterilite Baskets with Holes)
Reason?
If I can see the project I have started, I am more likely to work on it and FINSH IT!
Easily moved
Ability to change ironing covers
when they inevitably get dirty from adhesive or leaky irons!
MY SOLUTION
IKEA HACK
Kallax shelf unit with 4 doors, and casters
+
Custom removable iron board top
The Kallax shelf is 57 7/8″ wide when on its side. The height on casters is a few inches taller than I had my ironing board set, but makes a good counter height at about 35″ when on casters.
Now, for the fun part!
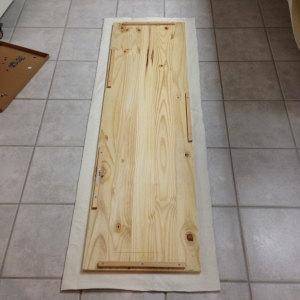
I took a pine board 17.25″ x 5′ long, and added some square dowels to frame out the top of the shelf. (If I did this again, I might make it wider – maybe 18 – 24″)
The ledge left around the shelf allows you an area to attach the batting to the board.
By framing a board to fit the top, the iron board will lift off easily for cover replacements when needed.
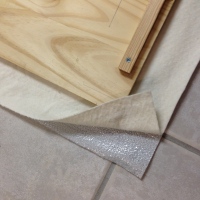
After the board was assembled, I placed it over two different batting layers. I used a cotton quilt batting next to the board, and a thermal fleece similar to Insul-Bright for the second layer.

For the final layer, I used “Ironing Board Cover Silver” fabric from Jo-Anns, made of 100% cotton with an aluminized coating. Muslin and cotton fabrics are prettier, but I have found that these aluminized covers stand up to iron grime a little better and can be wiped down with a damp cloth to some extent.

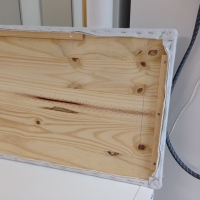
I stapled the final layer tonight (because the elastic I had on hand wasn’t strong enough to fit the cover tightly).
It will work until I can make up some covers with drawstring!
The storage area underneath fit my project baskets perfectly and there is bonus storage behind doors for plenty of ironing and sewing supplies.
This sure beats a traditional board!

