Image

Decades of Decibels

Who’s your favorite uncle?

It isn’t often that you get a call, and you immediately know the caller wants something, BUT, that whatever they are going to ask of you might actually be fun, so you let them talk you into a “Yes”. In this case, I became immersed in my first full T-Shirt quilt that I have dubbed “Decades of Decibels”.

I can’t claim design inspiration on this one as my uncle knew what he wanted. He had taken time to inventory and visually lay out the shirts he had collected from rock concerts over the years and had curated 30 black and white tee’s from his collection. I think allowing me to slice into some of these took some gumption. It was a pretty hard task not to try to convince him to let me keep a few to wear!

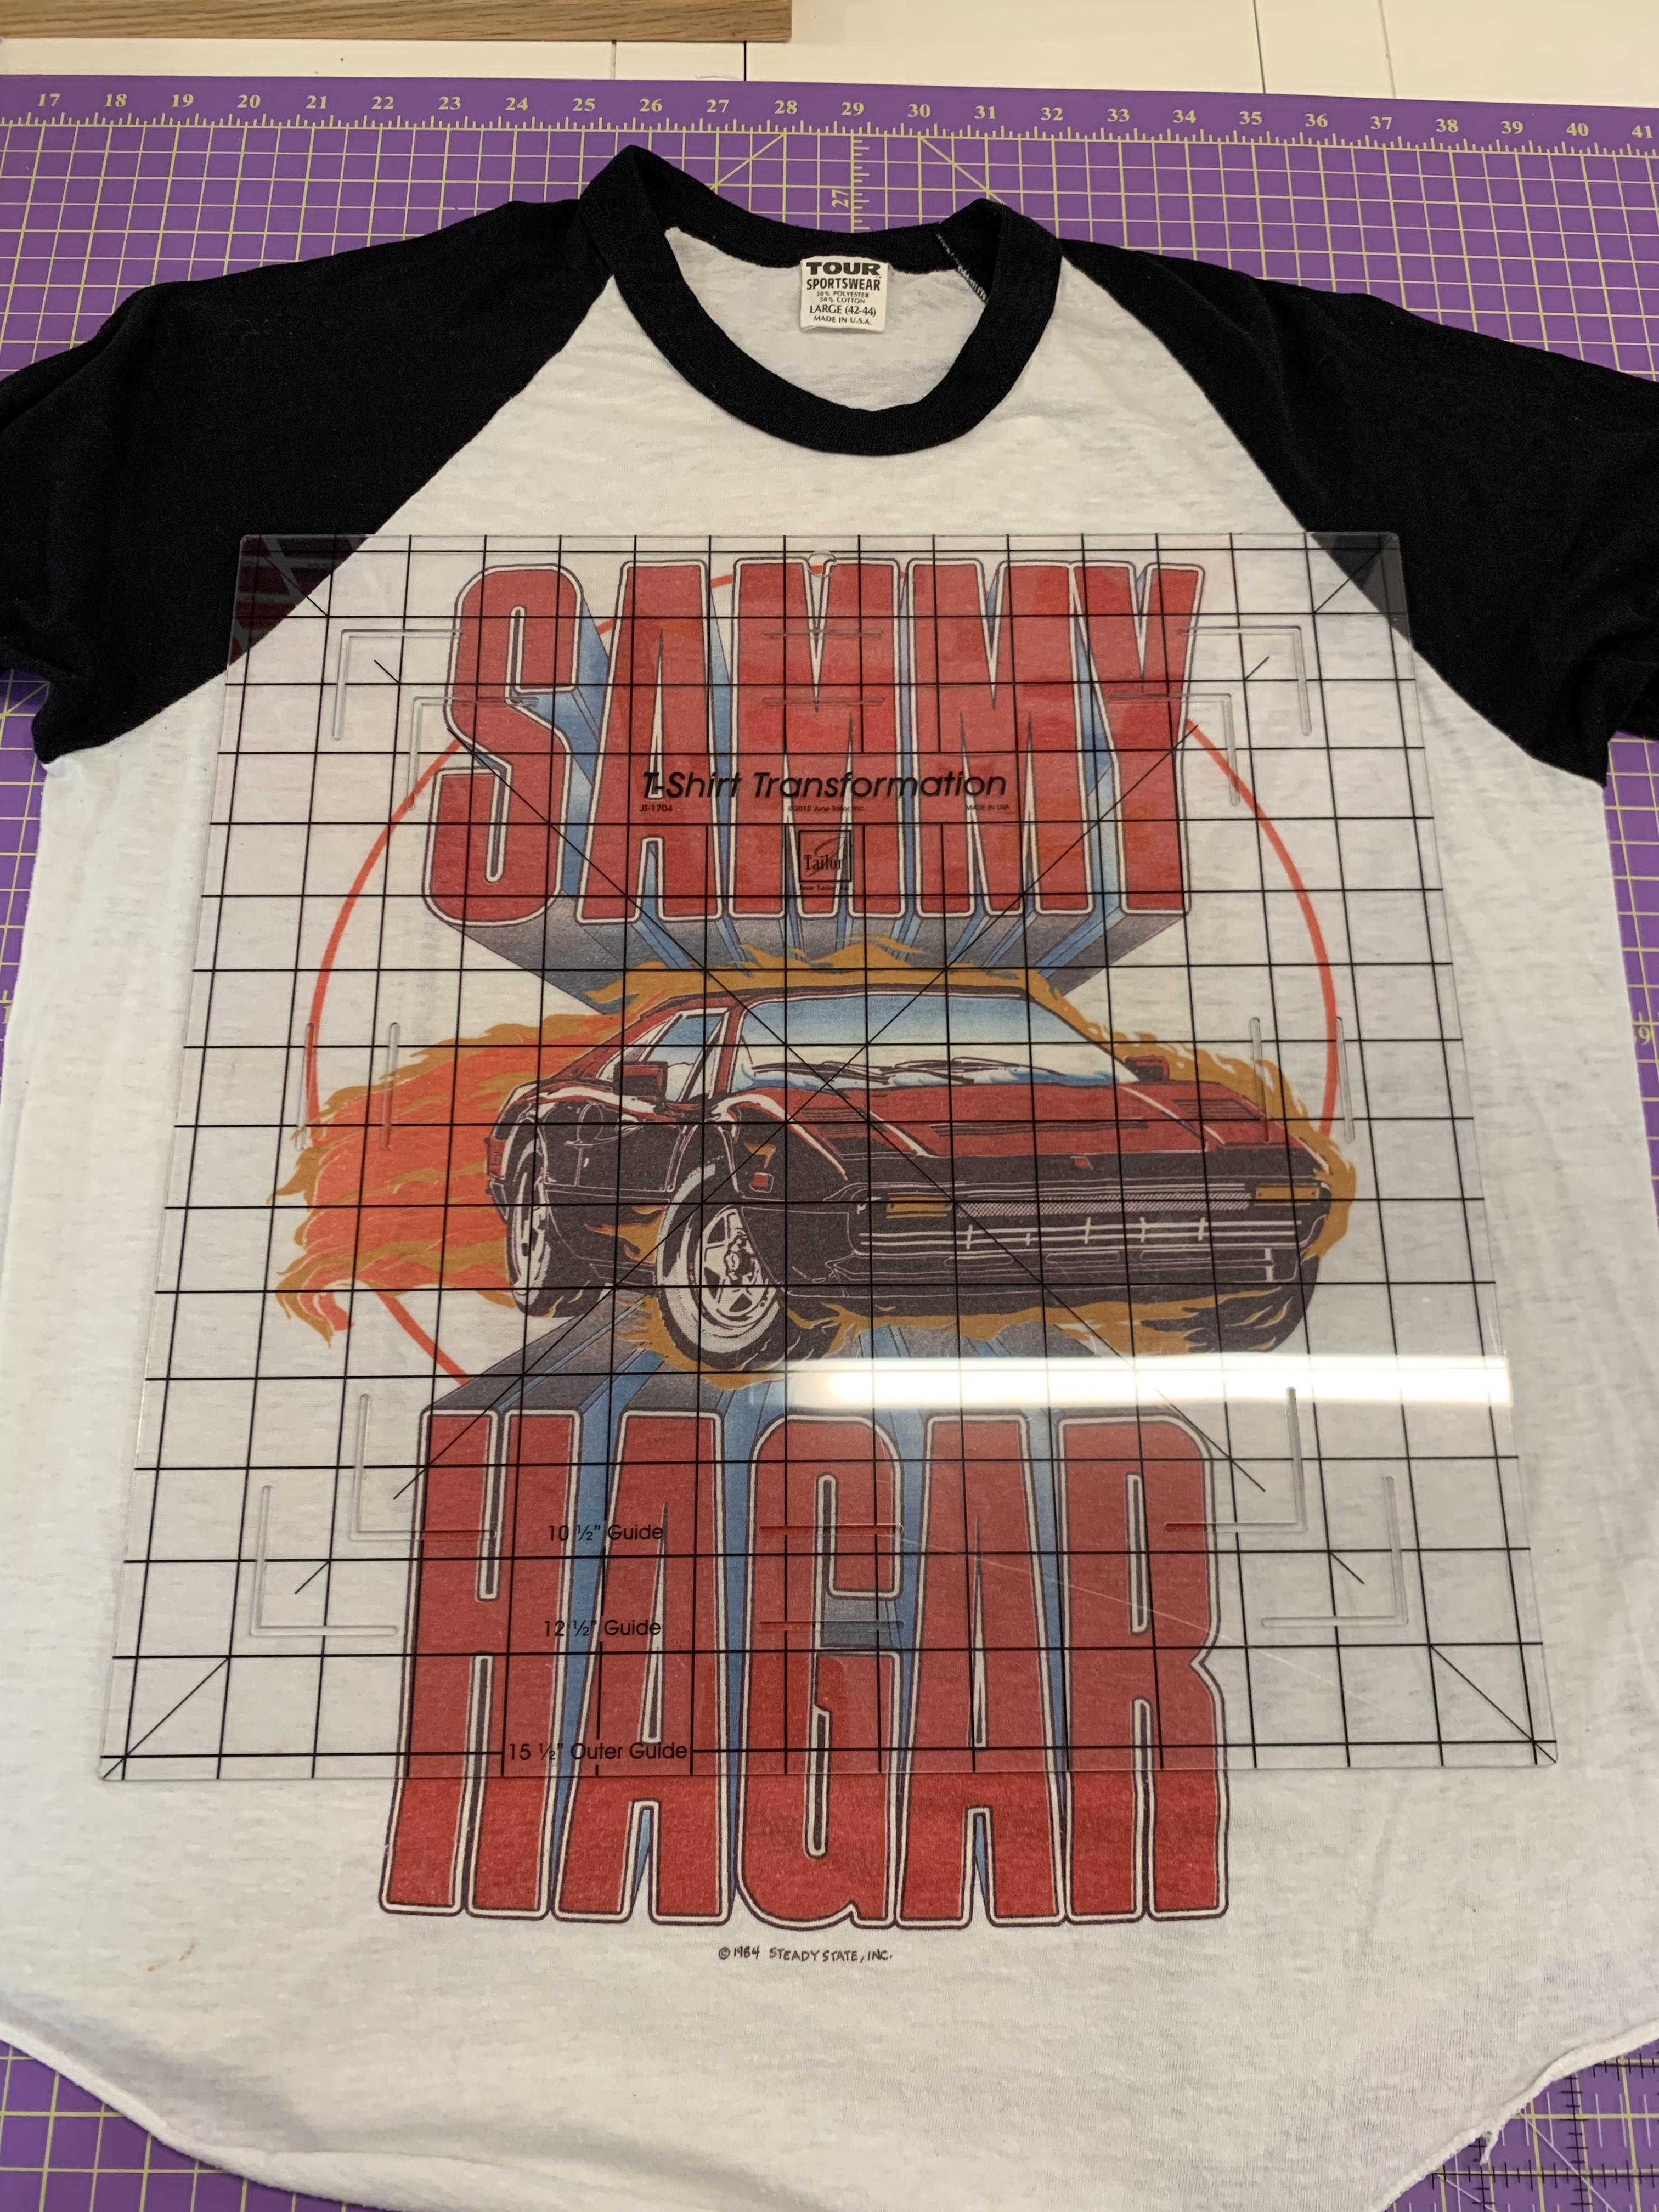
The original ask was to cut 25 shirts into rectangles, where none of the images would get cut off. However, I convinced him that it might be better and allow more of the shirts to make the quilt if we cut the shirts down to squares. A presentation given by Chris Jacobs, a member of the Kansas City Modern Quilt Guild, suggested that you would be surprised that you don’t REALLY need to the whole picture to immediately get the full idea of the design and memory. (I wholly agree and have experimented with it on some of my son’s old super hero tees.) In my mind, going square is similar to album covers, a fitting combination for bands who had their hay days in the 1970’s, 80’s, and 90’s. This ruler from June Tailor, June Tailor – T-Shirt Transformation Ruler, was perfect for helping to size the shirts up. So that I didn’t cut off anything my uncle found important, I had him center the ruler on each shirt and take a picture that I could reference later in the process.

I also used the design software EQ8 to visualize the completed project for him and suggested adding some interest to the blocks by adding drop shadow borders to two edges of each block. This wasn’t the final product, but you get the idea. He opted to have the same color for the edging of each block instead of switching between black and white as I show here. His quilt is also a little bit bigger!!

Each shirt took approximately 15-20 minutes to prepare. I started with the smallest shirts first. As you might be able to see in the pictures at the top, a few of the smaller baseball-style shirts ended up with the sleeve color included in my 15″ square cut. Since we were going for a checkerboard effect, I cut off the secondary colored corners and supplemented the square with the correct background color from the leftover pieces of the shirt.

Each shirt received the following treatment:

  1. Using scissors/rotary cutter, separate the front of the shirt from the back and remove the sleeves and neck area.

    NOTE: Don’t cut your T-Shirt down to size until AFTER stabilizing it!
  2. Apply Pellon SF101 fusible interfacing to the backside of each t-shirt front that we wanted on the quilt.

    Note: Pellon SF101 is available in both black and white. I used a Cricut EasyPress2.
  3. Now, post-stabilizing, cut t-shirt front down to size using the 15″ square ruler.
  4. Modify/supplement block corners on a few of the shirts.
  5. Add borders to two edges of the block.

Checkered Album Quilt Specifications/Contents:

  • 97 1/2″ W x 116 1/2″ L
  • 30 T-shirts (5×6), interfaced with Pellon SF101 (Black or White depending on shirt color)
  • Northcott Moda Wilmington Prints Timeless Treasures – Grunge Basics – Metropolis Iron (Shadows)
  • Northcott Moda Wilmington Prints Timeless Treasures – Toscana – Grey Yardage (Sashing/Border)
  • Quilters Dream bamboo batting
  • Omni 2025 Thread, 40 wt
  • Robert Kaufman – Warehouse District Wide Back – ANJXD-19798-2 Black

    I love this edgy line of fabric designed by Leslie Tucker Jenison and have used it in several projects already! I think it was the perfect pairing for this quilt.
  • Straight line stipple edge-to-edge quilting, similar to Broken Glass by Deb Geissler

I’ll get better full pictures later when I get to make the final delivery to my “favorite” uncle. Who else would let their niece play games on their awesome computer and take them on rides in their snazzy car! It almost makes me forgive him for tormenting me like a big brother. 🙂 Cheers.

It isn’t the 1980’s anymore. When new albums come out, we have instant gratification from our streaming services. No more running out to the record store. No more sneaking in to get that cassette tape of the Damn Yankees that Mom and Dad certainly would not have approved of. Records, Tapes, CD’s? I don’t think my kids would even know how to use one.

Let’s see what AI has to say about this collection. I had ChatGPT create a poem from the first 5 bands on the quilt.

“In the land of dreams and wonder,
Where the sky and sea meet yonder,
The Moody Blues serenade the night,
With melodies soft and light.

In the mystical land, Kansas reigns,
With tales of love and loss and pains,
Their music echos through the hills,
A symphony that forever thrills.

Bad Company roars through the land,
With raw enery and power so grand,
Their rock and roll shakes the ground,
And leaves echoes that resound.

Emerson, Lake & Palmer take the stage,
With a musicality that’s all the rage,
Their fusion of sound and style,
Is a journey that goes for miles.

And last but not least, Rush takes flight,
With music that’s bold and full of might,
Their progressive rock leads us on,
To places beyond the horizon.

These bands of old,
Their music true,
Still resonates with me and you,
And we’ll keep on listening, day, and night,
To their magic, their power, their light.


Quilting Playlist: Curated from the bands represented on this quilt by the quilter, her “favorite uncles”, her dad, and some friends who may or may not have ever listened to some of these bands!
QR CODE FOR AN APPLE PLAYLIST
HAPPY QUILTING!

Image

Lost and Found

Remember when it was December 2019? Ah, those were the days!

In December 2019, the Kansas City Modern Quilt Guild had a holiday party. One of the festive events was an Orphan Project Challenge. Members were challenged to have compassion for another person’s unfinished project and make it their own. If adopted, the project was supposed to be completed in 6 months.

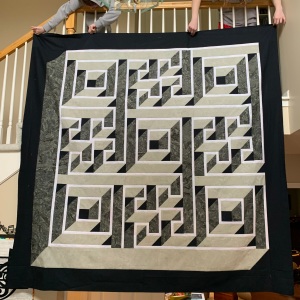
The project that I adopted contained the uncut fabric, and pattern called “Labyrinth Walk”. It is a quilt designed by Christopher Florence, aka “The Guilty Quilter”. I’d give you a link to his designs, but was unable to track down a recent web page. The patterns are available from many sources. This pattern is one that many of my friends and family had sent me as a picture of a “quilt I should make”. When I saw it on the table, I decided it was a sign. ¯\_(ツ)_/¯ I MAY have misjudged what the sign said, but c’est la vie.

Ok now, I remind you that today is September 2022. That is 33 months since the “adoption”. Somewhere in that time period, I lost my quilty mojo.

The assembly of the pattern was actually much more straight forward than I had anticipated. I really liked piecing it, and would love to try some of the other cool designs by The Guilty Quilter. The cutting for this pattern is a series of strips and the peicing can be done chain / assembly line style since the feature blocks are repeated four or five times on the quilt.

I even completed the top within that 6 month challenge period, April 2020. However, when it came to the quilting, I decided that it needed custom, like what the designer at Wasatch Quilting put together, to maintain and emphasize the 3D effect of the quilt. Somewhere between that daunting task, mask making, and other projects, the project languished. In hindsight (33 months later), maybe and edge to edge would have been the ticket!

I think the part that stalls me on custom computerized quilting is the repetitive stop and go nature of very small designs. Full disclosure. I loaded this quilt on my longarm around December of 2021. I had every intention to work on it, stop and go, while I was taking online classes. I think that I let my classes and family / work responsibilities give me excuses NOT to work on this!

But, finally, I buckled down. This quilt is completed! I used a batik backing to compliment the front colors and a lightweight batting (Hobbs Heirloom 80/20). This batting has become my go-to for most quilts. It really does look cool, and once I share it with my guild (albeit, a little late), I think I’d like to hang it on the wall in my entry, going up the stairs. It can be a reminder to not give up, even when you feel lost!

The next patterns I want to pick up are Passages, and Crescendo! I think both have a ring and vision to them that will be perfect for decorating in my music filled home.

Has there ever been a project or time that you lost your quilty mojo? How did you find it again? I learned that I am a SLOW quilter, a multitasker, and a finisher. In time, I get things done. I don’t like it when something is languishing.

Image

A Humming Bird

Remember this? I needed to remove the entire hook assembly, and work at the rust. I have to say, I wasn’t sure how this would turn out in the end. There was more rust between the layers than I anticipated. It required several rounds of soaking in kerosene, some scrubbing, then some buffing. I needed to get it to the point that everything could move smoothly and thread wouldn’t get caught on rust or burrs when stitching.

This is a quick video of the first “movement” test. Keep in mind, at this point, the machine has not been oiled.

It’s Alive!!

Once movement on the hook assembly and bobbin case was tested, I cleaned the machine up. I needed to wait until the new belt arrived to continue working on the machine. The original belt was brittle and falling apart due to age. The motor ports didn’t appear to have any lubricant in them, but the carbon brush was surprisingly un-worn. My guess is that piece HAD been replaced at some point in time. I did remove quite a bit of thread that had wrapped around near the belt bushing / cap.

Fast forward to today. The replacement belt, the only non-vintage piece we ended up needing, came in the mail! It was time to oil the machine, lubricate the motor (no lubrication on gears for the white machine), and install the new belt. Now we are getting somewhere!

I was surprised by the noise that the machine made when the belt was not on the motor. I did not take the motor apart to investigate. However, after fully assembling it with the belt, the noise seemed to go away. If I was suspect of anything that might need additional work later, it will be this. However, It could be related to the lack of lubrication that has been in the motor for a long time.

Scary Motor Sounds

Final Adjustments:
– Re-install the belt
– Install the needle
– Wind a bobbin
– Adjust bobbin case tension
– Adjust machine tension
– Polish (because, why not!)

Listen to it hum! I am happy with these results. I managed to repair it with some kerosene, oil, motor lubricant, and a $10.95 part! With a little de-rusting and some general machine care, this machine is brought back to life. I’m sure with regular maintenance and use, she will last a long time.
Now, it needs a name. Doesn’t every good machine?
But, alas, I don’t get to keep her. This belongs to my friend. Hopefully, my friend gives her a great name and if he finds any other orphans at the antique and estate sales, he will keep me in mind!
Featherweights are pretty fun to work on.

Happy Sitching!

Image

Feather Beds Are Over-Rated

Now we get to the meat of the machine.  Some of the most important areas to look at on a machine you want to refurbish / repair are interior mechanics and the exterior bobbin case and hook assembly.  A cosmetic finish can be replaced. But the mechanical components must be functional to make it worth it. A machine can look beautiful on the outside, but be a hot mess inside.  Let’s look inside of this cutie.

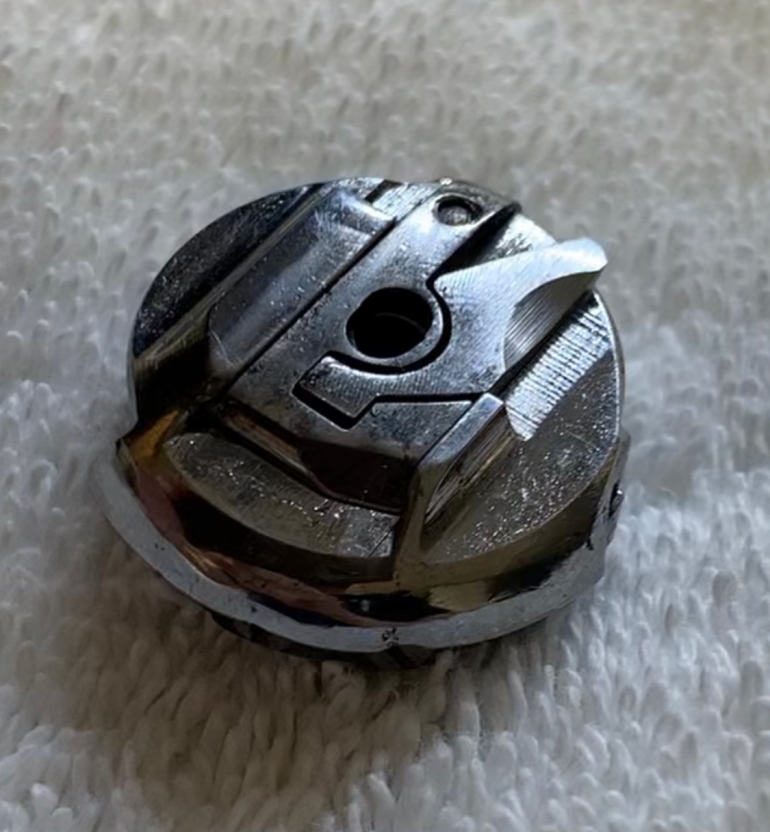
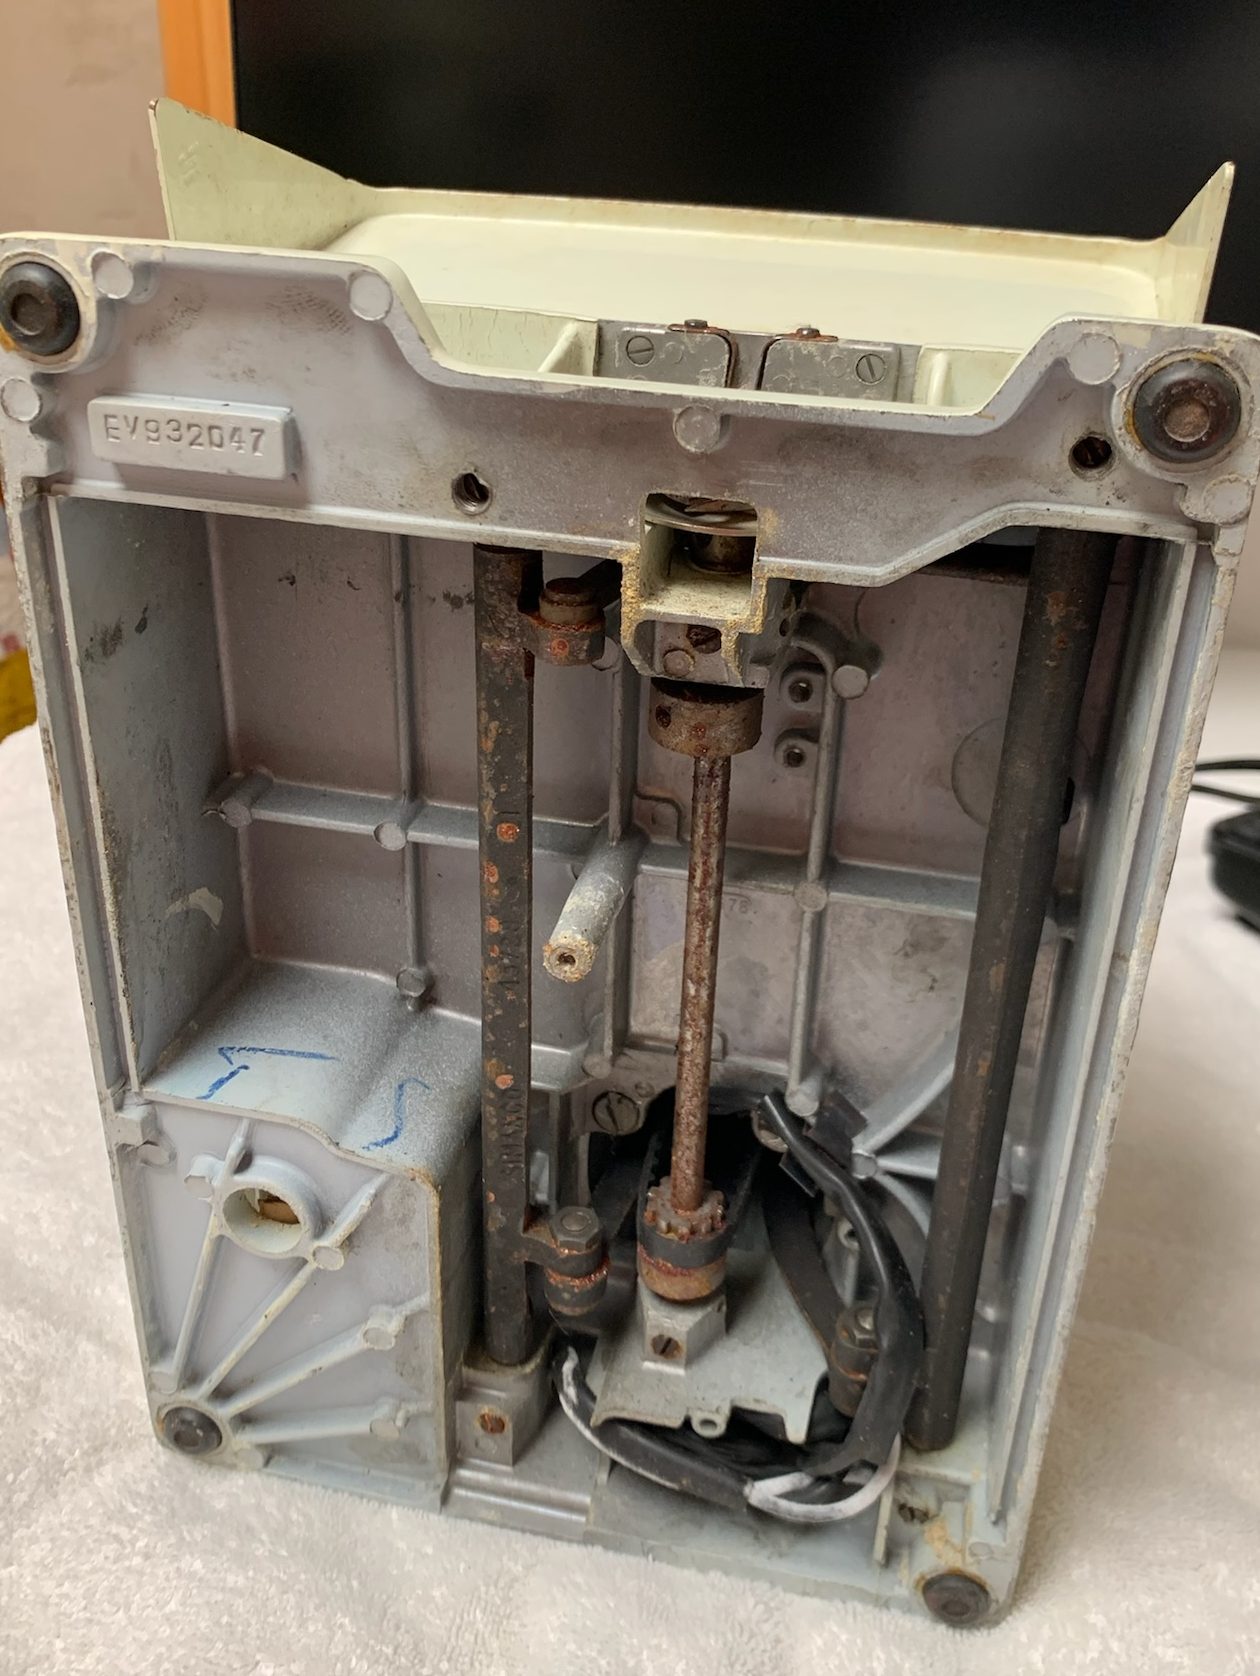
After removing the oil drip cover, there is some evidence of rusting, but nothing that concerns me. Those mechanics should clean up well with some kerosene and machine oil.   The part that worried me was the bobbin case and hook area.  There is significant evidence of rust.  The bobbin case was completely seized onto the hook assembly, and the hand wheel and assembly could not move.  This machine wasn’t going anywhere.  Furthermore, the bobbin case lever was “free swinging” and no longer moved the bobbin case slide.  The bobbin case became the first order of business!

First, get it out, carefully.

Second, remove as much rust as possible and try to disassemble it. 

Original, vintage bobbin cases are always best if your machine has one, and can be cleaned up enough to function.  A replacement can cost anywhere between $75 – over $120 depending on if you are after a reproduction or a replacement vintage model.

As luck, and patience, would have it, I was able to use machine oil to gradually get the case to budge.  Normally, you could remove the case with part of the hook assembly, but that was rusted in place too. 

Here are some pics of the bobbin case after extraction and before I was able to get the bobbin removed.  Yes, the bobbin was also stuck in the case. Fun fact.  As I accessed the bobbin and started removing the threads so that I could see better, I took off no less than five different colors of bobbin thread!  Is that a thing, to wind many colors of thread on the same bobbin?  

I mentioned that the slide was seized on the case from rust. After soaking it overnight in kerosene, scrubbing it, leveraging some WD40 and some gentle tiny mallet tapping, I finally removed the slide. To my utter surprise, the tiny spring inside was not rusted out, just surrounded and the slide unable to move.

This story has a happy ending in store I think.


I was able to get the case cleaned up and buffed. I might have to work on the interior more and test out the other spring. However, the slide and lever is now functional again, AND will fit on and off of the hook assembly! This is a very good point to be. The next line of business is the hook assembly itself, another $110 part to replace. Let’s hope we don’t have to do that.

Scorecard so far: Only one part that must be replaced, the belt, and that part is ordered and in the mail!

To be continued…

Image

A Moody White Feather

On Tuesday, a friend, and previous colleague texted and asked me if he could drop off a recent find. Lucky for me, it wasn’t a kitten, and light as a feather!  He was able to purchase it at a reasonable price, but it would need some tune-up and repair (see the picture, complete with mood lighting!). I hope we can get her running!

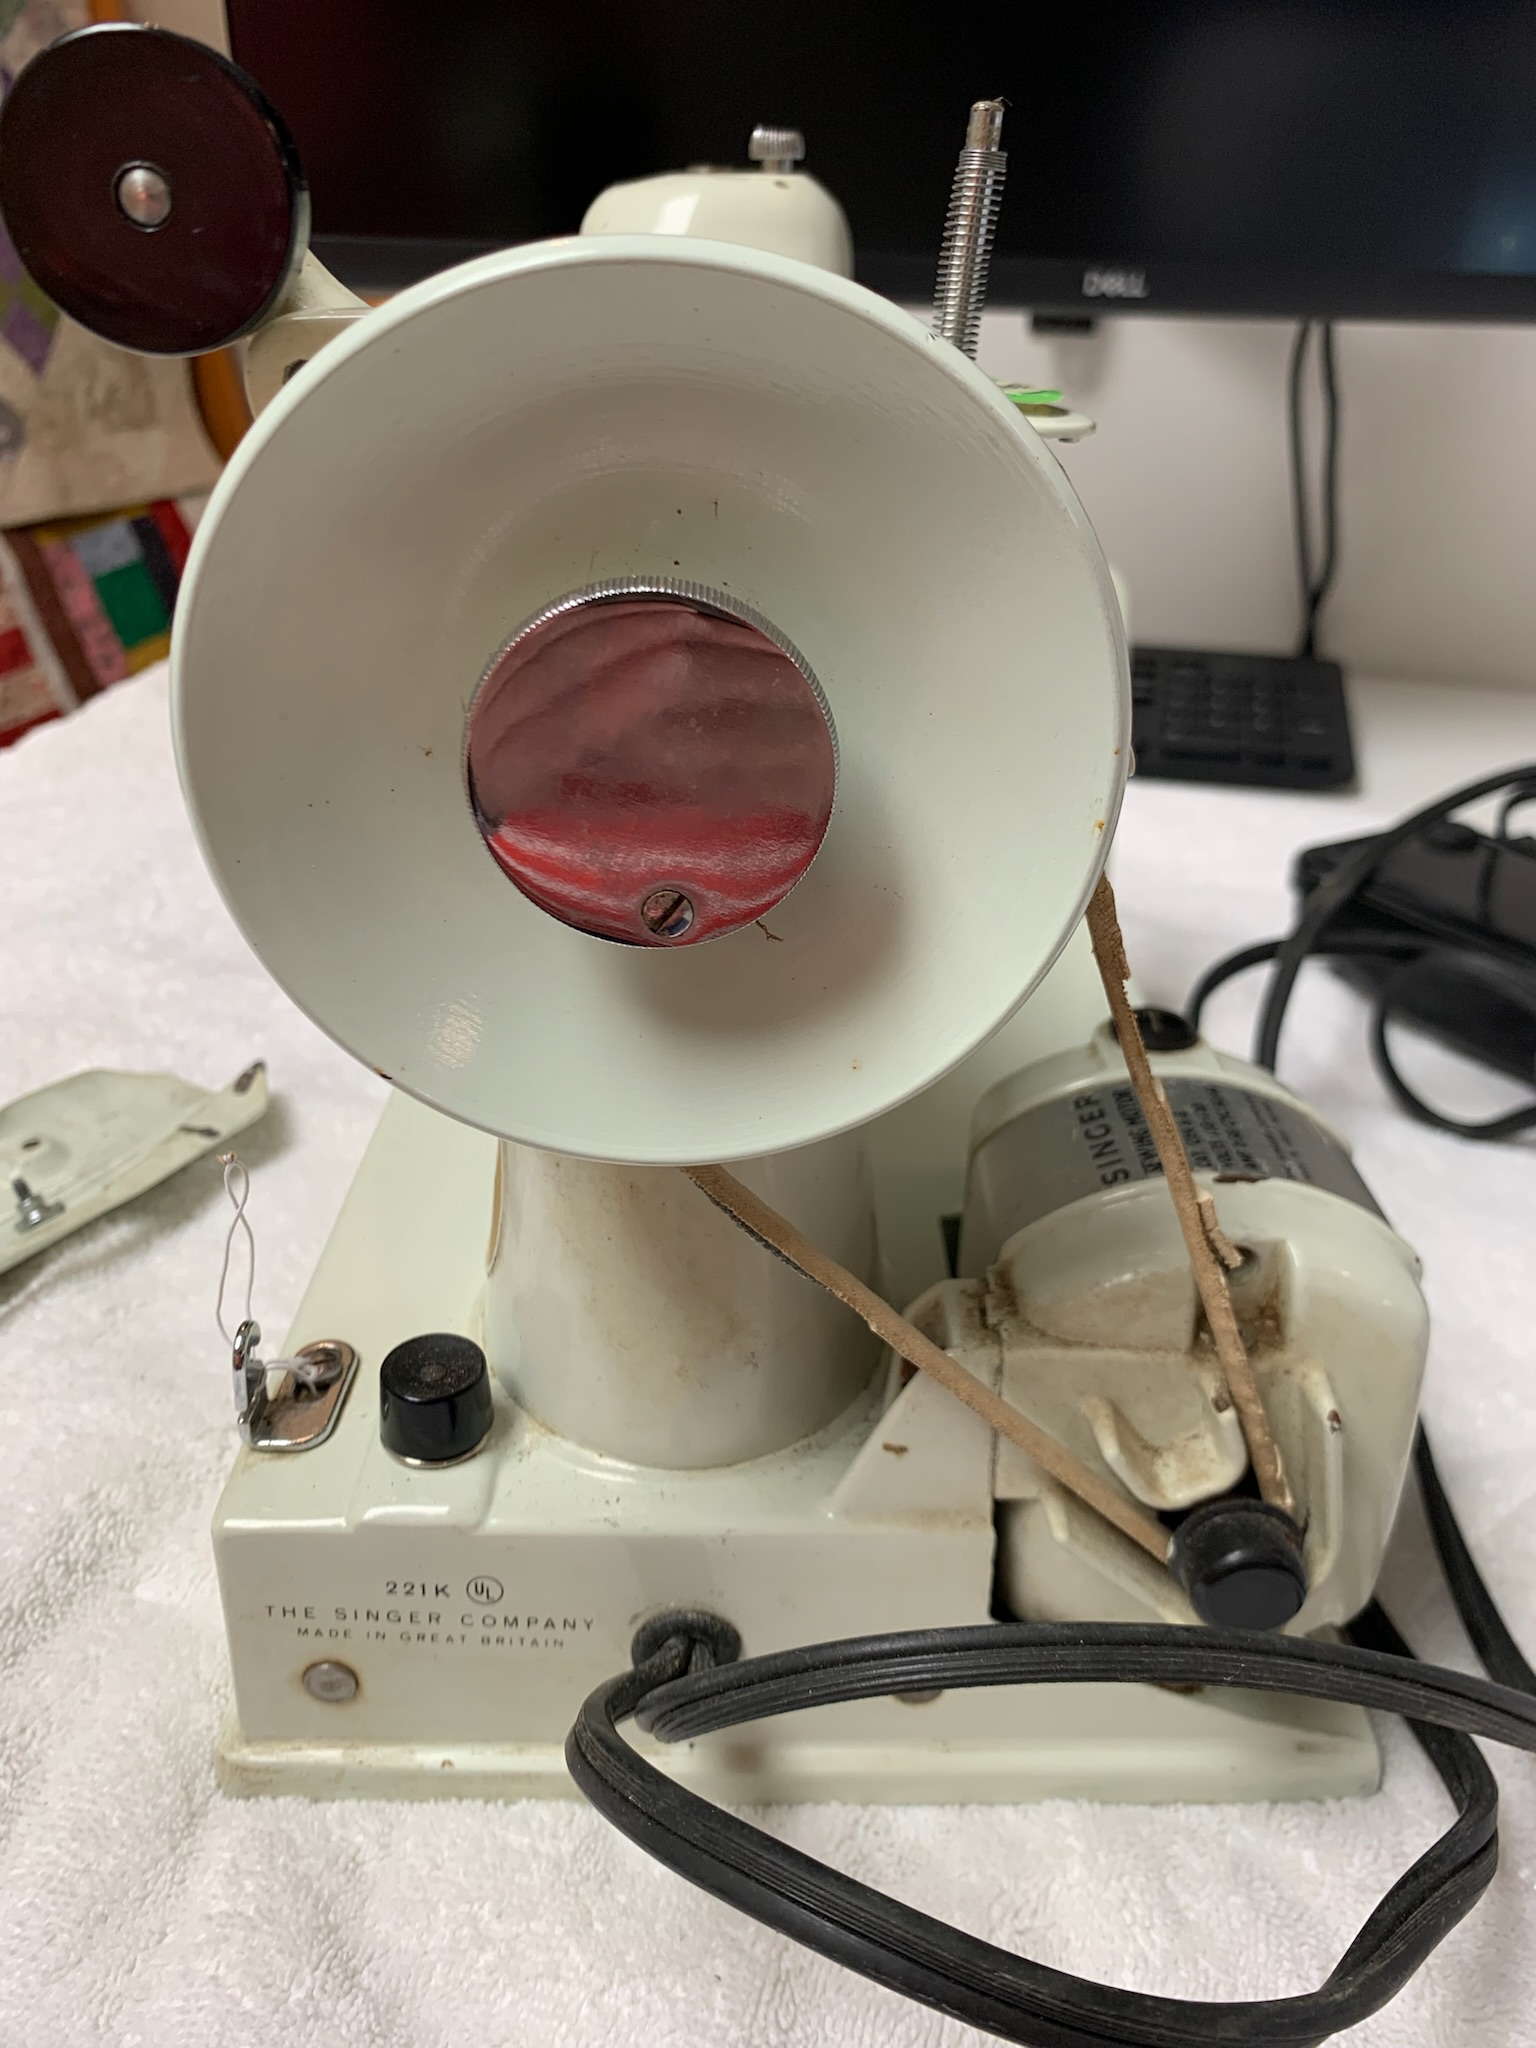
I couldn’t resist diving right in. The machine is a Singer 221K Featherweight, circa 1964 and manufactured in Great Britain. My mom has one like it and loves that it runs so quiet! Here are some pictures of the machine on arrival. If you are interested in the history of the white machine and how it compares to earlier models, take a look at the Featherweight Shop’s schoolhouse post.

The machine appears to have some chipping and exposure to moister / water damage. The belt is not salvagable. I was surprise at how brittle it was. However, since my friend loves everything vintage, the goal is to recover all of the other original vintage components if possible. The first order of business is to look under the hood and see what the mechanical components and the bobbin case looks like. Just wait until you see what we found!

To be continued…

Image

Decked Out

Most of my quilts are not born of need, just of a desire to make them. One of the hobbies that my son has taken to is skateboarding. I started this quilt some some time ago. The background fabric was chosen to represent the concrete of the skatepark, and the fabrics, just something with texture.

Skateboarders like to customize. The trucks, wheels, and deck are the three main parts. My favorite has always been the variety in the deck and board art. It’s probably why when when I ran across the Kickflip quilt pattern in an old magazine, I decided it would be fun to put together. When I challenged my son to help pick some of the feature fabrics, we ended up with elements from old-school pop culture, asian strength and luck symbols, and what I call “muscle car” features. If you look close, some of the decks have dragons, tigers, flames, lightning, luck, and Dr. Who characters.

From a technique standpoint, since the intention of this quilt is for use by a teenage boy, including many rounds through the wash, anywhere that applique was called out, I did some math to fully peice the block instead. The deck blocks are definately large enough to display or highlight large print fabrics.

For the quilting, I chose “Catching Waves” by Christy Dillon. I like how the movement in the quilting works with the structure of all of the board decks.

Image

Just.In.Case – Part 2

Recently, Mary Alice, a commenter on my 2017 post, Just.In.Case, wondered how the singer featherweight case handle was sewn. I’m not sure if she wanted to know how the handle itself was made, or how it was attached to the case.

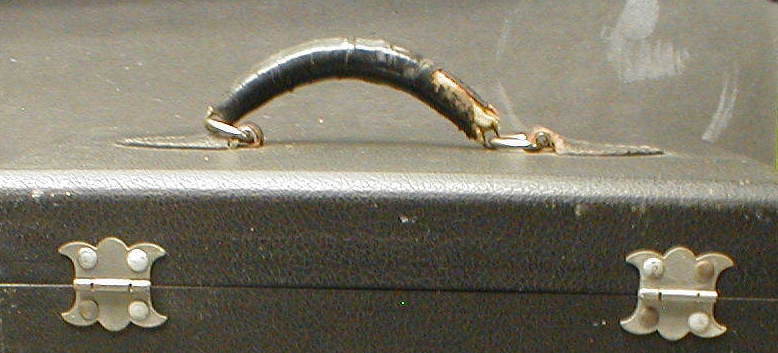
The D-ring handle on my case was really damaged beyond repair.

Original Singer Featherweight case handle


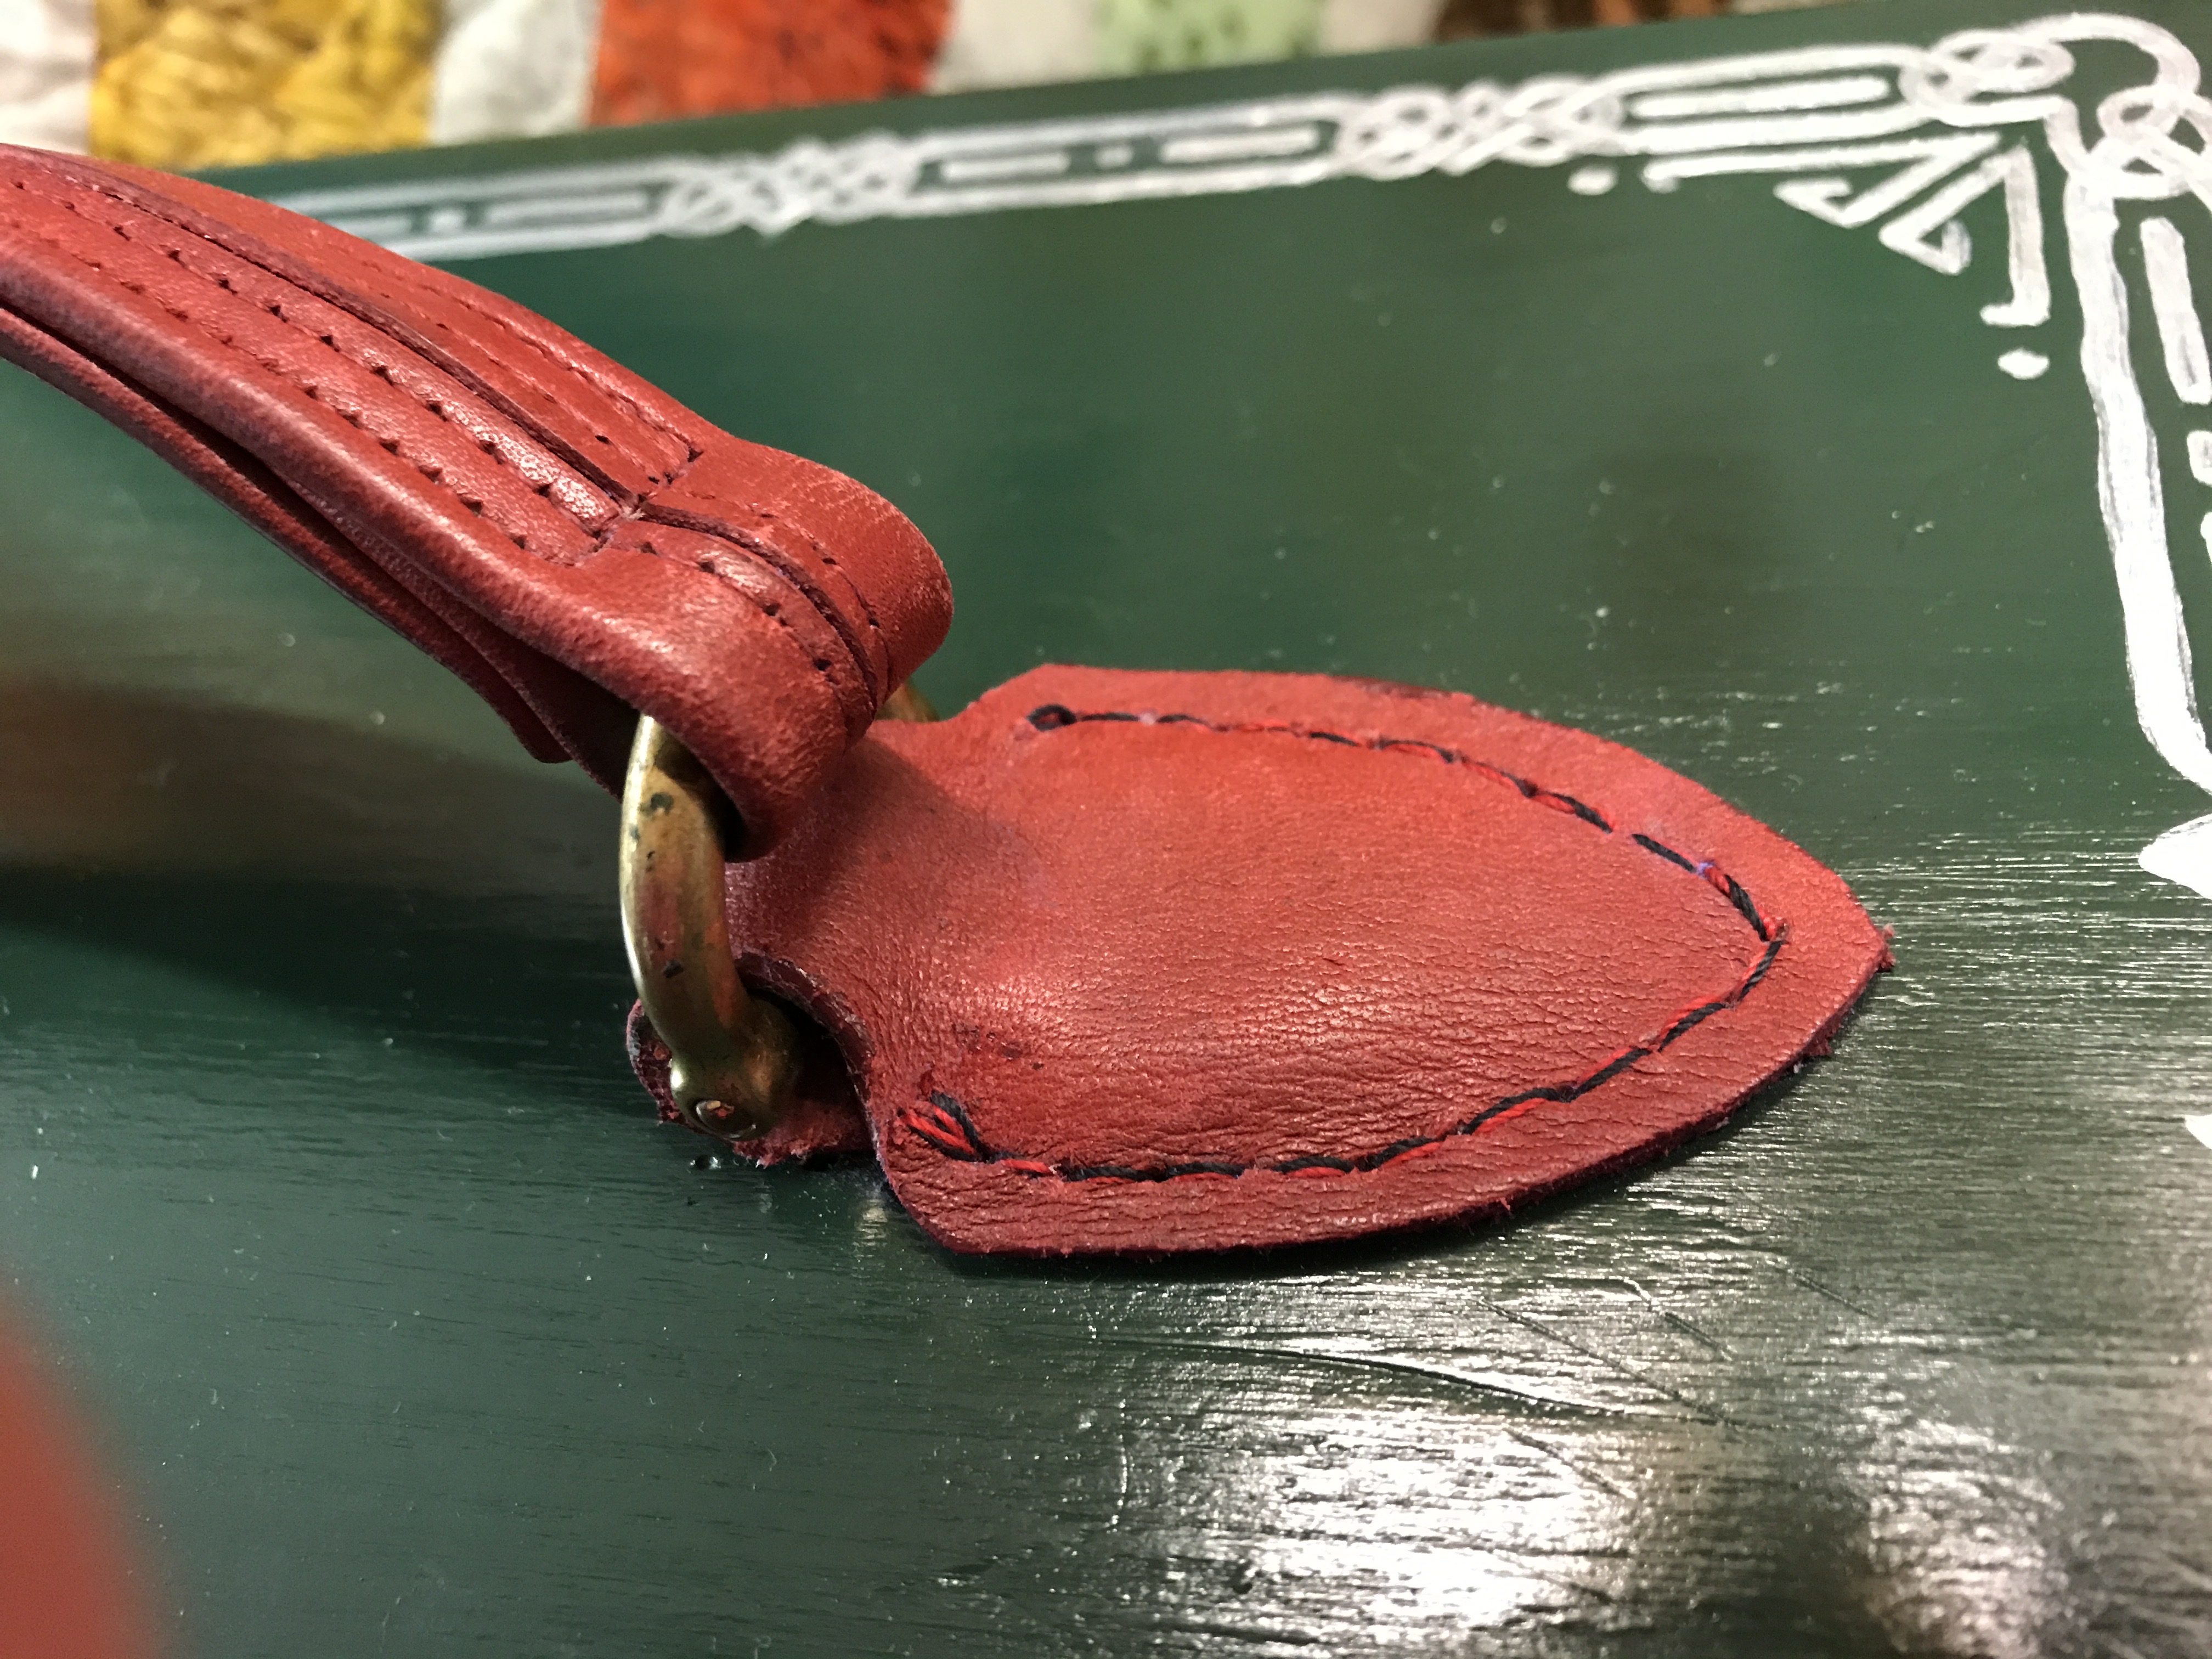
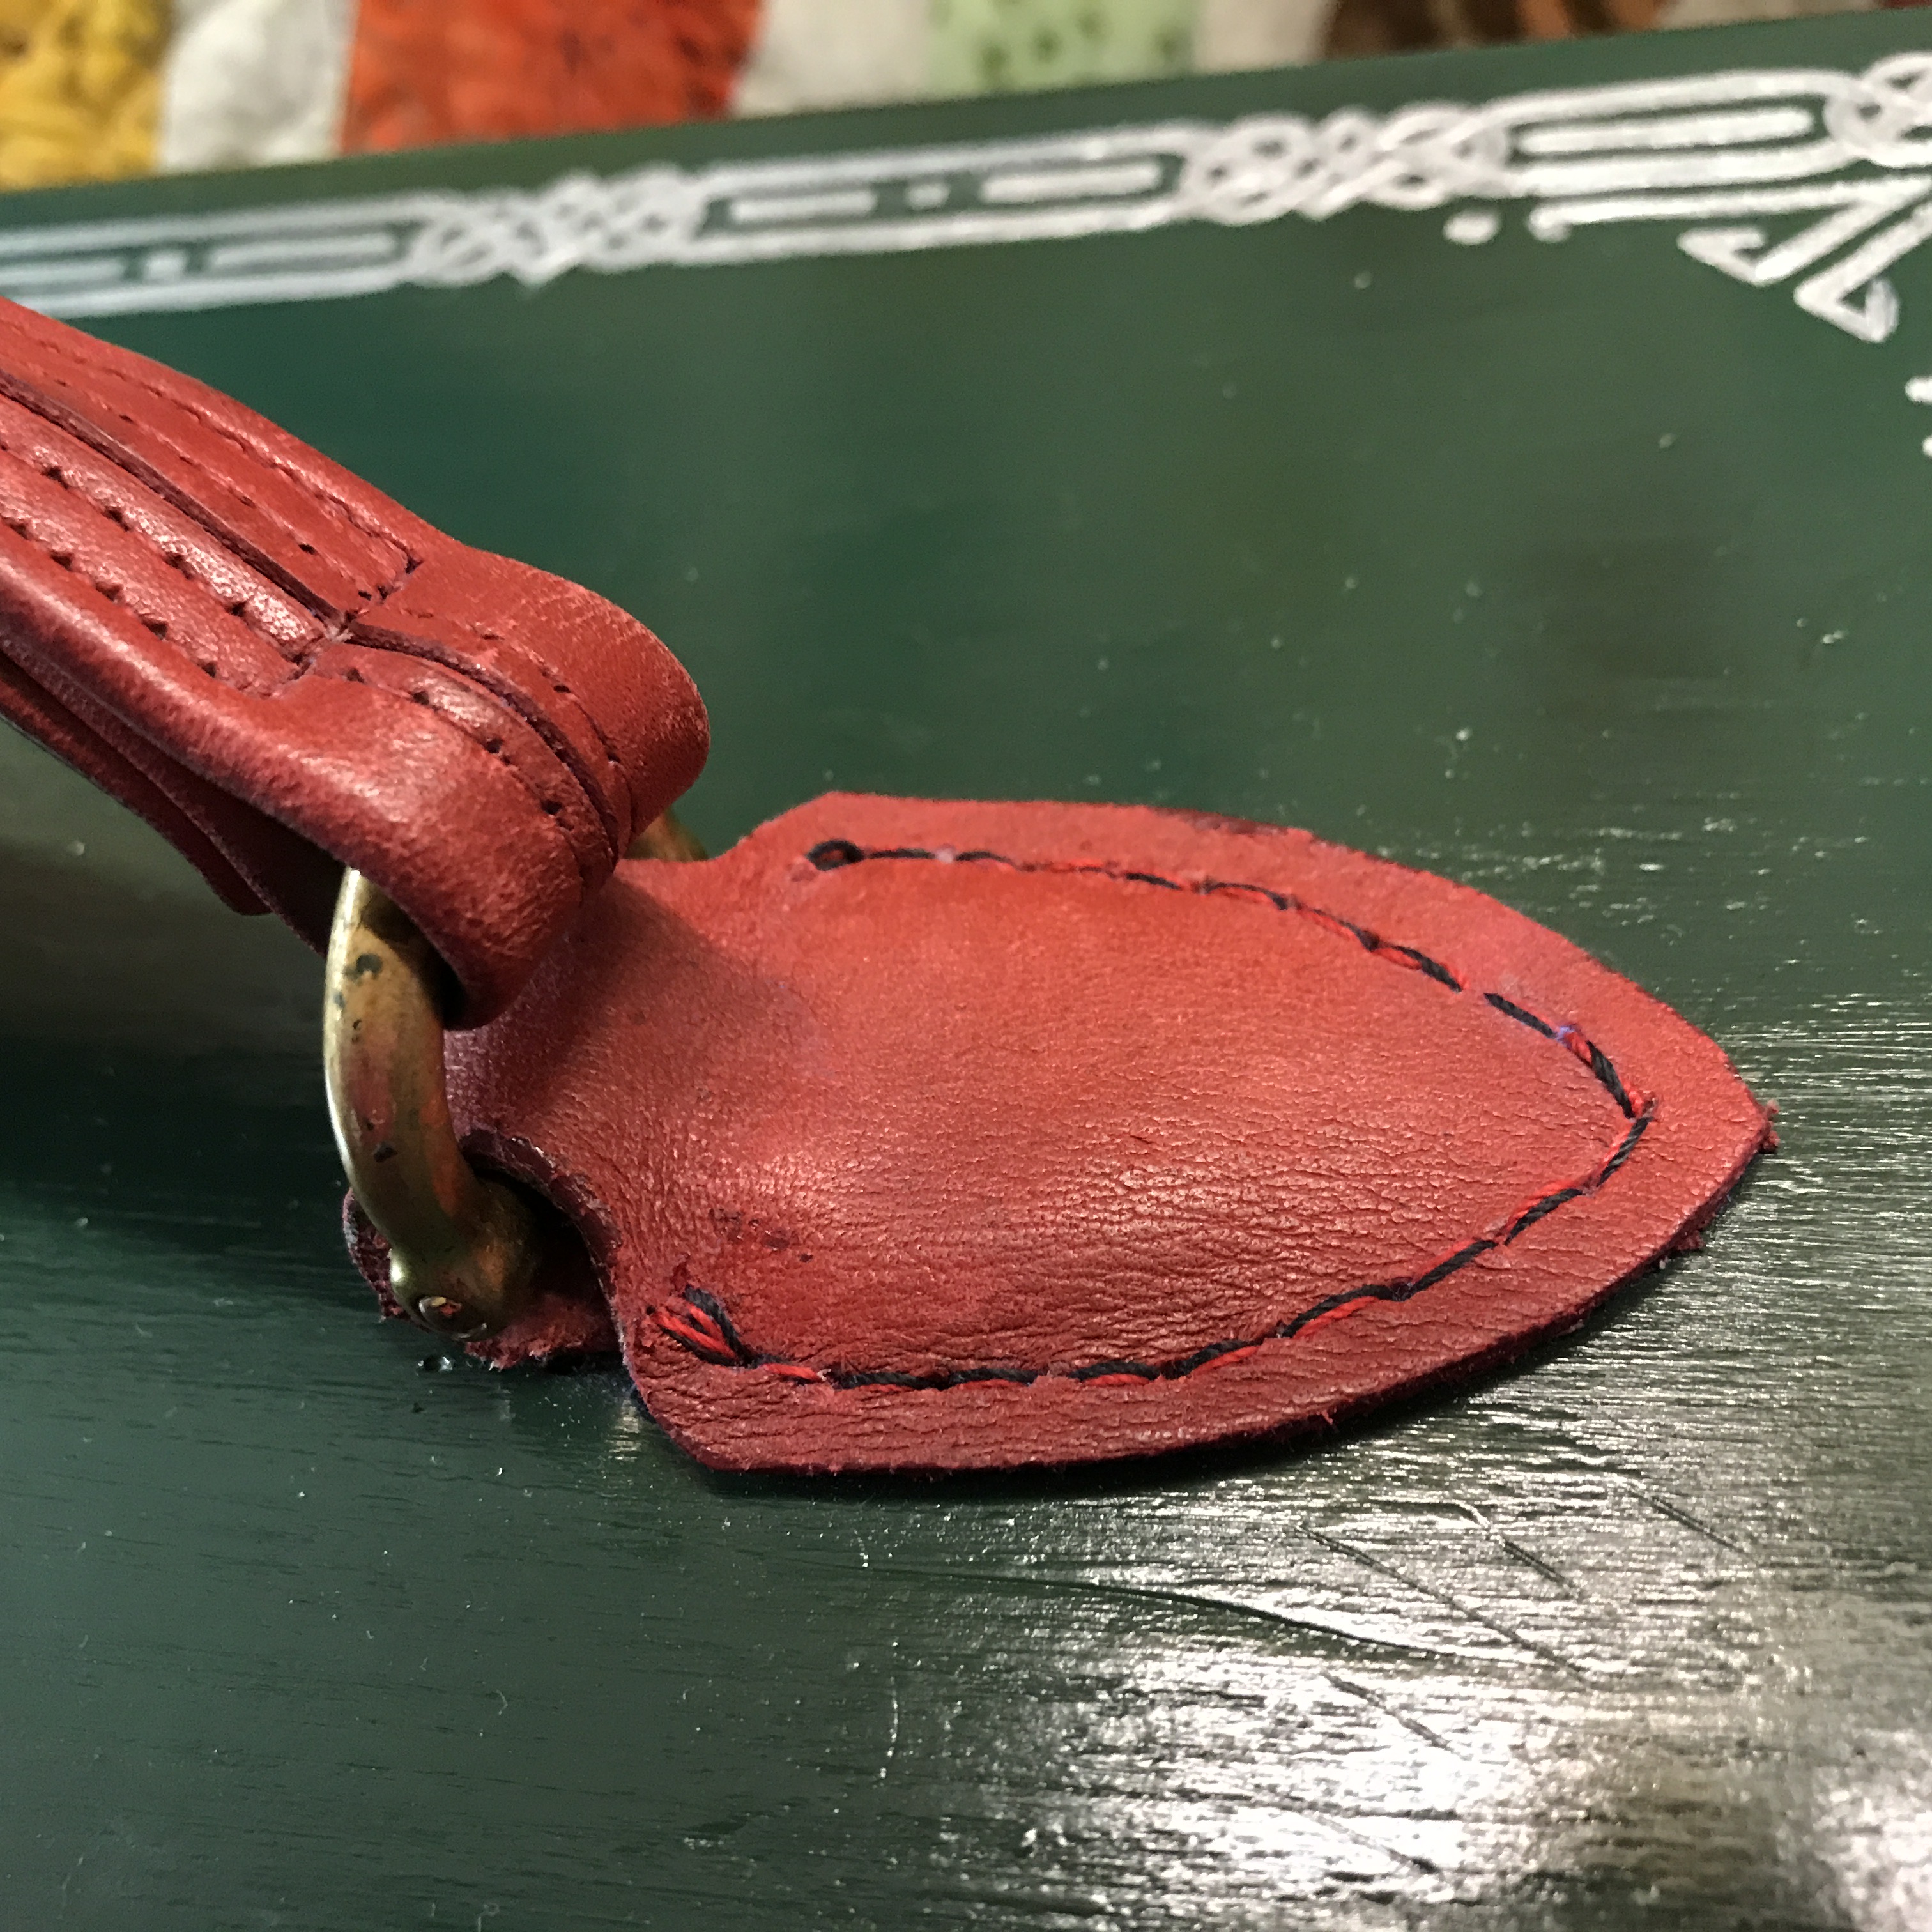
If you want to replace the handle with one that is as close to vintage as possible, try picking up a replica replacement handle like they carry at The Featherweight Shop. As I was not maintaining the “vintage” replica feel, I really love the approach that my dad took with my case. He shopped thrift stores for a leather bag with a handle the size, style and color he needed. Then, he went to the business of deconstruction and replacement. I am posting some additional images and details that he shared with me on the repair so that you can, hopefully, see how the handle was originally attached.

Here are some details from my dad, the magician.
If you look at the stripped case lid in the top left, “you can see the holes where the original leather was sewn on and the slots where metal prongs of the main handle anchors passed. On the inside, there is a metal plate the anchors passed through to distribute the load to the lid. I reused the metal pieces that passed through the lid and the holes for the leather, I laced by hand. You can use tracing paper to copy the holes to the leather and use an awl to duplicate the hole to the lid.”

If I was to fix anything else on this case, it would be to replace the clasp on the right. It’s pretty finicky, and I alway worry that it won’t stay latched. Between that and the age of the wood, I think that my dad’s solution of the strapping for longer carry times worked out nicely.

Image

Time Travelling – A Quilty Expedition

Last weekend I had the opportunity to visit Hamilton, Missouri for a weekend of visiting with friends, fabric shopping, stitching, and a day visit to a new time machine, the Missouri Quilt Museum. The museum officially opened in 2019 and is the project of one hard working family. I admit that I was amazed at the progress and work that has occurred in a short period of time. If you are looking for the perfect addition to your trip to Hamilton, don’t miss this museum. I’ll post a few pictures here, but leave the rest for you to discover on your own!

The museum is situated in a 30,000 square foot, 100 year old schoolhouse building. They have currently opened up two floors of the building to exibits, with more planned. I found myself exploring exibits around historical quilting, quilting memorabilia and technology, vintage sewing machines, the largest collection of “toy” sewing machines I have ever seen, minatures, and amazing displays from both unknown and renowned quilters. If you have ever visited the National Quilt Museum in Paducah, Kentucky, you will also know how significant it is that they have partnered with the Missouri Quilt Musuem and have quilts on display in Missouri as well. I heard that this display will change out along with some of the others every 90 days or so. I can’t wait to go back!

Some things I was schooled on…

Featherweight fans. I’ve heard of pale green featherweight machines, but research deludes me. Did Singer actually make green machines? During my visit, one vintage featherweight on display indicated that some of the Singer white machines that had the pale turquoise / green cases actually “tinted” the white machines slightly making them seem green. If you have found any more detail on this, comment and share what you’ve found!

The “Aloha – Wish We Were There” exibit featured quilts from two missouri quilters, Dianne Harmon and here sister Dinah. Have you ever made paper snowflakes? These quilts have inspired me regarding applique techniques. Imagine using fabric, instead of paper to make applique designs that fill your entire quilt. I definately want to try this technique. Check out the details at the museum’s website above. This post looks like a good start for me; How to make Hawaiian quilts. I’m going to try a mini first and instead of doing a Hawaiin design, I’m going to try my hand with snowflakes.

While there were many other exibits, the final one I will share here takes the cake for me. The National Quilt Museum shared a display of quilts from their collection. Believe me when I say, “I am not worthy”. The quilts and techniques in their collection never cease to amaze me. Sometimes a picture is worth a thousand words. How many peices do you think this quilt by Nancy Ota, San Clemente, CA called “Infinity” is created from?

I hope you, like me, will visit and visit often!

HAPPY QUILTING!
Image

Data is Beautiful, part 2 – Roses

2020. It goes without saying that this year’s global events have required strength in the face of uncertainty. Businesses and individuals have relied even more heavily than before on data to bring understanding and actionable insights to their families, teams and communities. One tricky part of doing this is to create a visualization that can be understood by a wide population.

Data is Beautiful : Part 1

I feel fortunate that I have been able to buckle down and work on my Master of Science in Analytics (remotely), support my family at home while they moved back and forth with remote schooling, and in November, I was invited to join a new team, Optimally, as a data engineer! (Say that three time fast! It’s no wonder I have not posted here in almost a year…) I didn’t realize until they brought my “first day” supplies that their logo happened to be a form of a rose diagram, one that some statisticians might call a “coxcomb chart”. Some of you may have seen my “2019 In Review” post that contained my “data is beautiful, part 1”. It was actually another version of the coxcomb (inverted for art sake).

The rose chart logo made me smile. It couldn’t be more appropriate for 2020, and you guessed it, I said, That needs to be a quilt block“. This weekend, I got around to playing with the idea.

Optimally Logo
Data is Beautiful: Part 2

WHY could it not be more appropriate? Well, from what I’ve found, the “coxcomb” chart was created back in 1858 by Florence Nightingale. It is a variation on a pie chart. She was a a legacy in nursing as well as an experimentalist in visualizing data. So there you have it. I think that visualizations and nursing have both played key roles in 2020. I’m not going to call this the year of the pandemic. I’m going to remember it for a key marker in the latest data revolution.

The quilt block representation of the logo was created with raw edge appliqué techniques.
1. I started by cutting circles of my “rose” petal colors. To make the appliqué easy to apply to the background, I applied the fabric to fusible webbing, like the Pellon Wonder-Under product.
2. Then, I divided the circles into 72 degree wedges (I wanted 5 equal wedges => 360 degrees / 5). A rose can be split and layered into many different sizes and petals to give it a different look.
3. To get the spoked look, the wedges simply spread out, or you can trim the edges off the wedges equally on both sides. Doing the second method ensures that you get the perfect circles where you are keeping the depth of the petals equivalent.
4. Press the wedge into place on your background.
5. Stitch using a “blanket” or appliqué stitch. If you zoom in, you can see that when I do this, I like to match my thread to the fabric color.

Tip: If making a small block and you have an image of the correct size, you could print it, then cut templates of the pieces for less waste.

Rounding out 2020, I am thankful that my family has remained strong during this uncertain year and to have the opportunity to work on a team that values helping small businesses as well as providing flexibility to their employees to take care of their families and bring value to the community through their work. Data IS beautiful and visualizing it can be powerful. If you wonder what this new job I have is, check us out at our Optimally.com site. I think my new quilt block will become a mini quilt, and once we are actually back to the office, I can share it with my team. Maybe it could be a traveling icon for #kudos and a job well done?

Happy Quilting!

Image

2019 In Review and Sneak Peek

2019 Review:   Family, Education, Quilting (In that Order!)
While I have been relentlessly working to enjoy my family and add to my skills in data science,  I managed to still spend time with my best quilting friends and finish some projects along the way.   It was a light year for photographs and blog posts, but I hope you all enjoyed the “tricks” that I shared during the Dueling Threads retreat.

Quilty Finishes:  7 quilts long-armed for others, 2 gifted quilts, several minis and some charity quilts, 2 quilt shows, and 2 retreats.  Plus,  I got to see my Mom participate in her first quilt show!  She does beautiful work.IMG_5213 2.jpeg

I feel pretty good about 2019, and some of my latest works in progress are going to turn out great!  Here is a sneak preview to some of my favorites for 2020 in my studio.

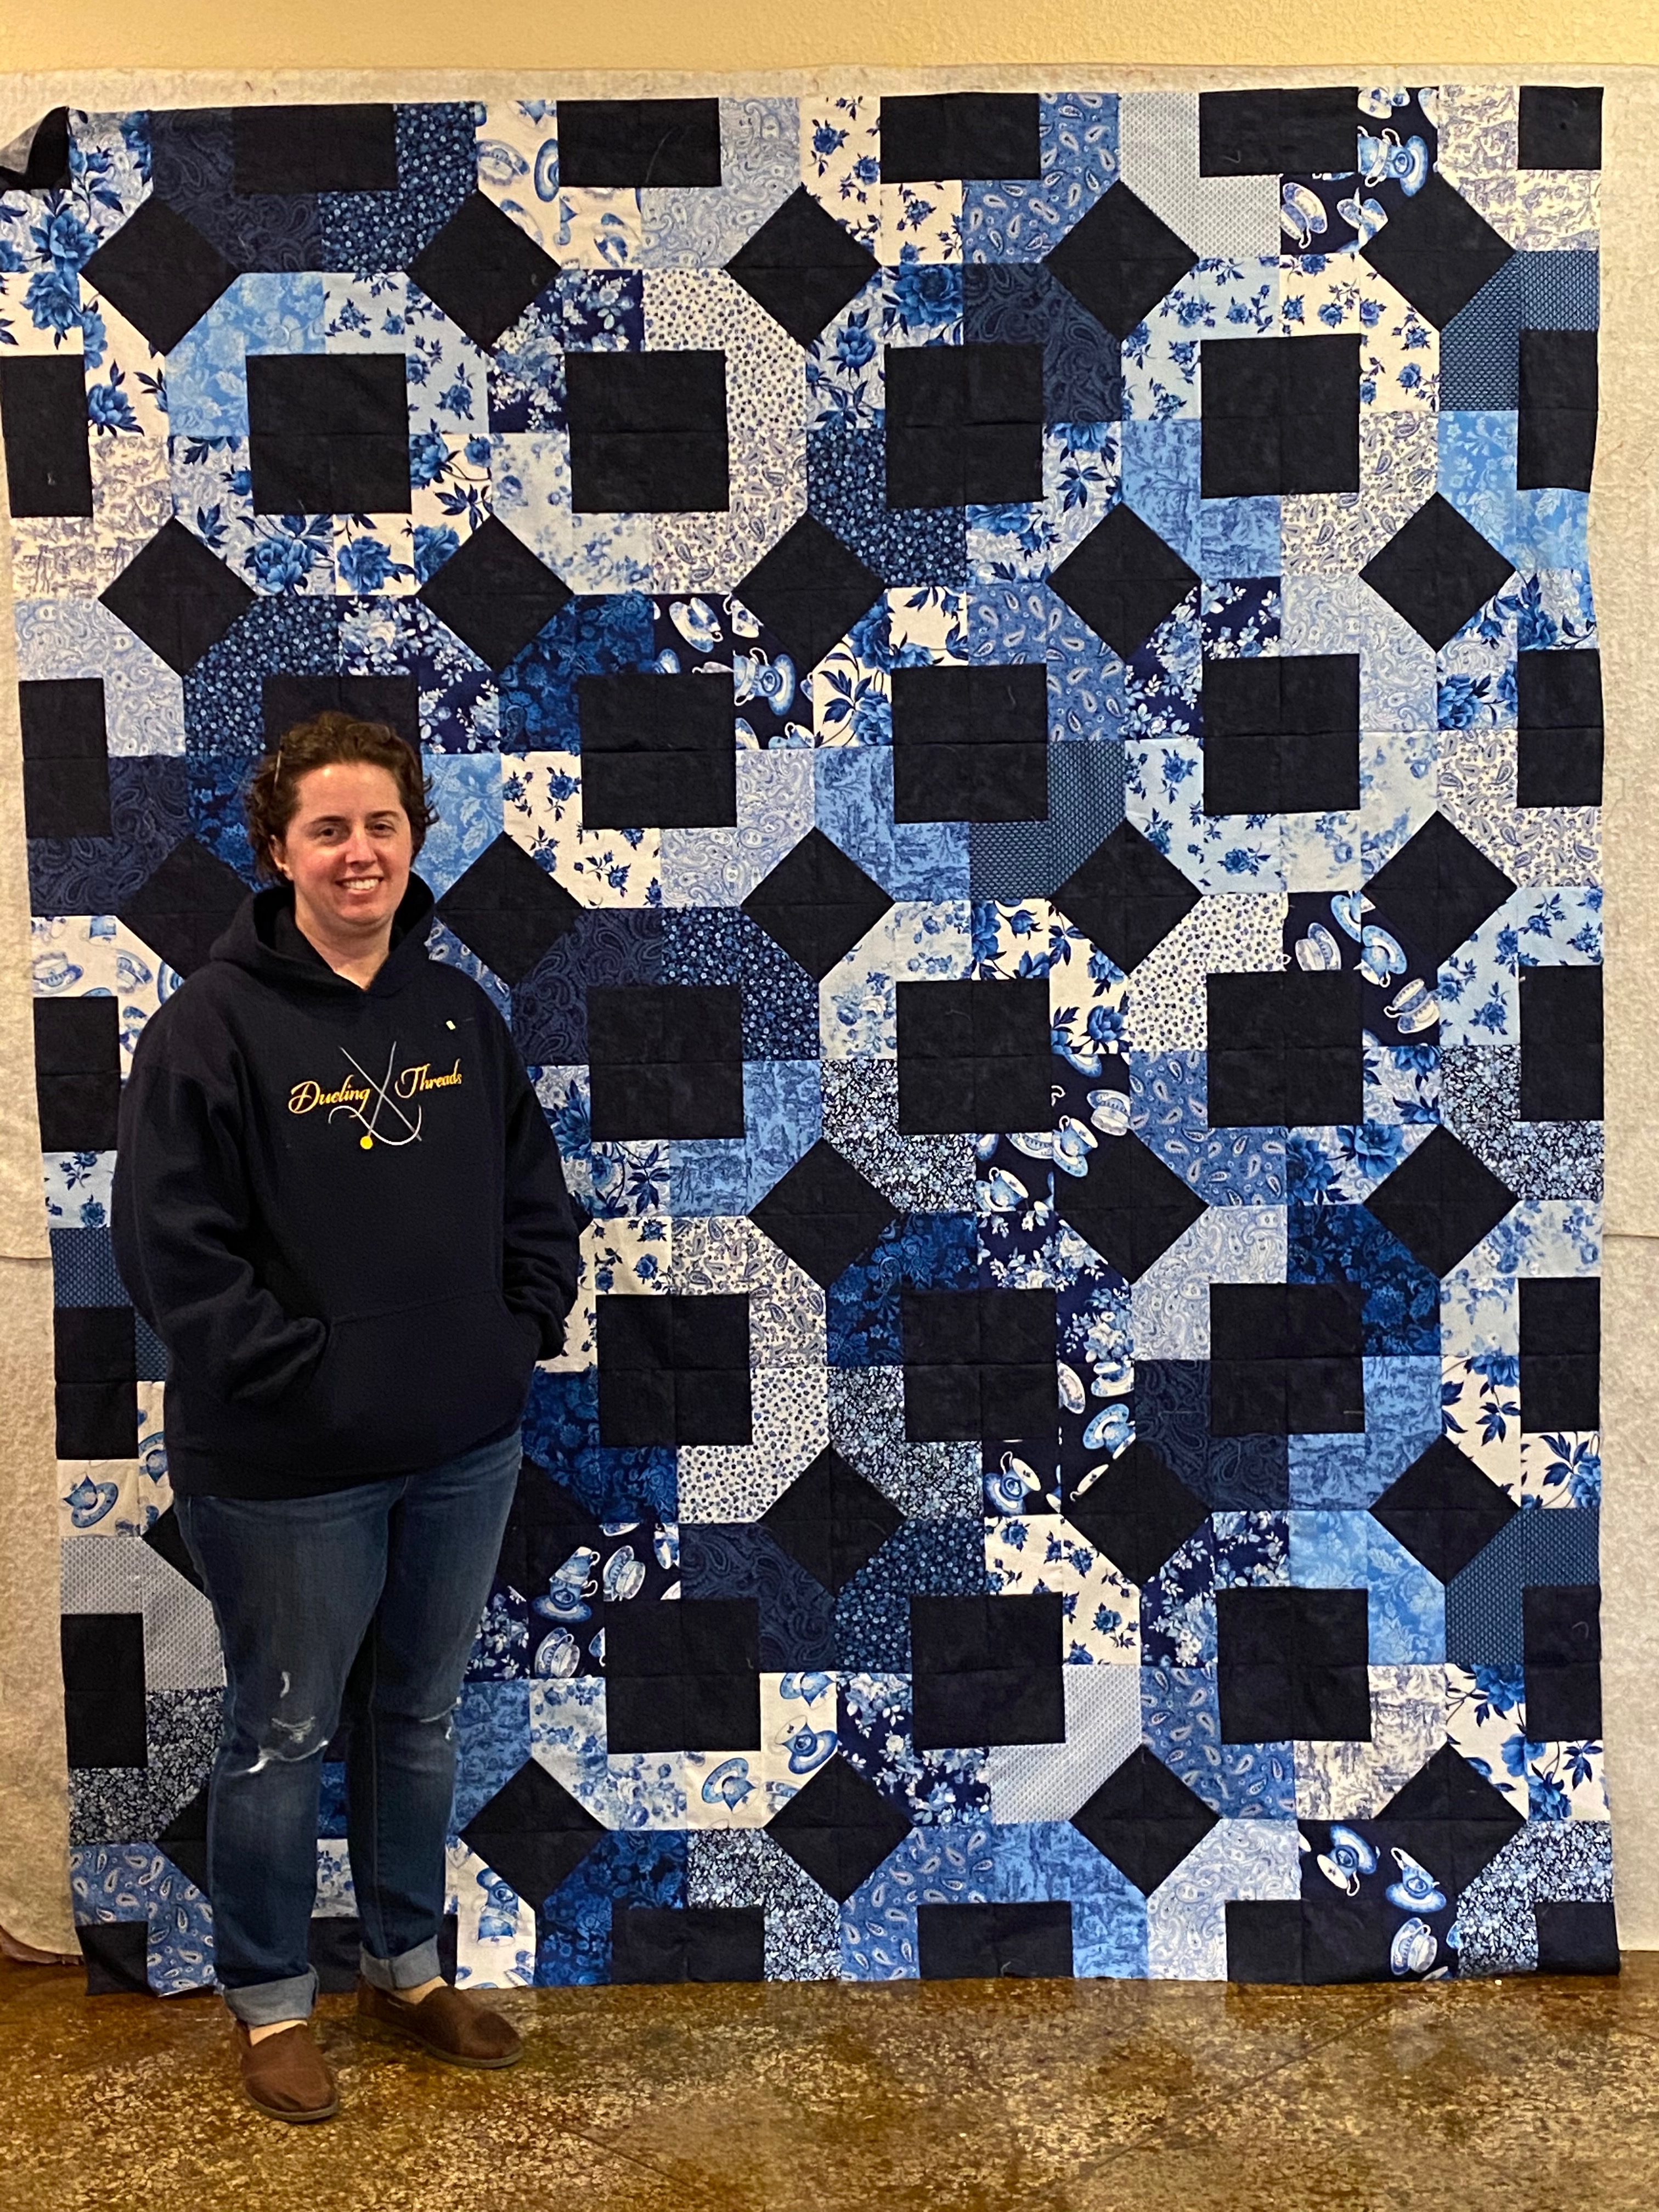
  1. “Delft” Quilt:  All in blues a little like Dutch pottery decorated with metal oxides.  It still needs border and quilting, but I am well on my way.
    IMG_6122

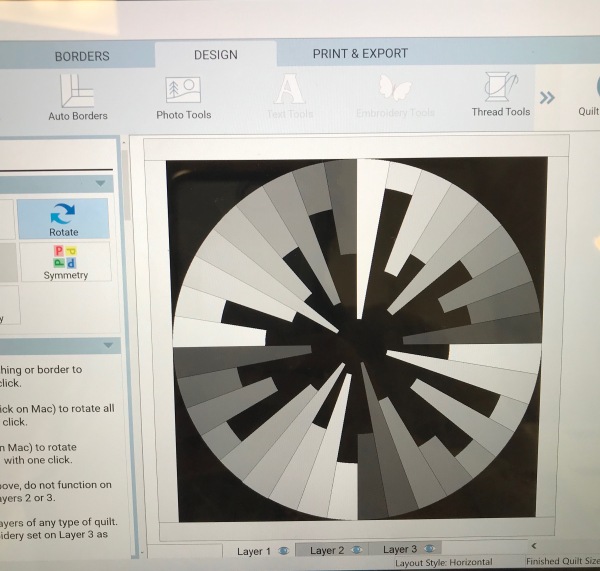
2.  Data is Beautiful – Take 1:   This design is an original work in progress and was inspired by a graph that I saw during one of my classes.  Sometimes graphs are not very good for telling a story or conveying information, but they sure are beautiful! I remember sitting there saying to myself.  , “That is a terrible graph, but it needs to be a quilt!”.   I’m still working out the technical details, but I enjoyed choosing the colors and coming up with the first draft.

IMG_4896IMG_5079

3.  Icy Aurora:   I started this quilt in Fall of 2017, and am finally to the home stretch of custom quilting it.  It is a variation on the binding tool star quilt that I saw in the MSQC Block magazine.   I used a scaled down version of the binding tool to create the outer border.  The white in the quilt is a batik with subtle icy blue dye mixed in, so I am quilting it with thread of a similar color, called “iceberg”.

4. What’s a snowman with out a snowball fight?:  This pattern by Wildfire Designs Alaska, had been on my bucket list for a while.  I didn’t make it originally because I waited too long and the fabric in the pattern had already sold out.  I found new fabric in spring 2019, so tackled this in December and January.  However, you can see that I imagined him as a whole and am adding some fun mittens and snowballs from the Lori Holt, Bee in My Bonnet, Quilty Fun book to the bottom so that he can hang on my door.