Image

Tweetheart – First of a Vintage Farmgirl

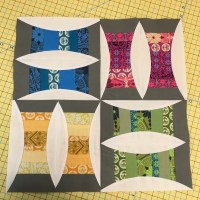
My birthday came this month, and I am happy that I was able to complete all of the focus blocks of the Curve It Up Sampler.   I am still working on the sashing and will post a completion some time this year (after quilting it).

I always have something planned to fill the void.  My mother once again gifted me with a project for my birthday.  She gave me the pattern “Farm Girl Vintage” by Lori Holt.  I know that she bought this because she liked it… I will be surprised if she can hold off long enough for me to make it first! I planned to wait just to torture her, but frankly found it irresistible and started right away.

This pattern is the perfect fit for some of the older, small print, stash (gifted to me by my grandmother).  This will make the finished quilt even more special!  I don’t have the experience of growing up on a farm, but know that I would have fit in just fine… right up to  the point of mucking out a stall.  I had better stick to gardening!

The first block I selected from the collection was the Baby Chick, complete with a half and half heart.  A Tweetheart for February!

I marked the legs for embroidery using a Frixion pen.  Mark, Stitch, Press.  The marks disappear with heat.   Notice how the colored piecing goes to the edge of the block?  These blocks will definitely look best with sashing.  Otherwise, the designs would meld together in places.

After a heart for February, March will come in like a Lion. Stay tuned.  I will try to post some tips and tricks for creating a scrappy farm girl sampler out of my “vintage” fabrics.

Happy Quilting! 

Image

Curve it Up – Block 12 – Spinning Spools

My final block for the Curve it Up sampler quilt is completed.  I’m writing this from an altitude of over 14,000 feet after having about a day to recover from the pain…

image

I created this block using the suggested “scrappy” method where the middle of each spool is strip pieced from small scraps at least 5″ wide.   The result was that I misjudged the amount that a long pieced curve stretches while gingerly fed under the pressed foot.  I literally scrapped three spools before I settled on a method that let me trim them to the correct size.

This block requires that you trim to 4 1/2″ x 8 1/2″ by lining up the rectangle on points of both curves.   If your sides stretch, at least one of those points does not fit.

Tip1:   Starch everything.

The starch will help limit movement of the fabrics and seams cut on th bias.  I was not successful until I did this.

Tip 2:  Fewer seams = less chances for stretching as the seam bulk goes under the pressed foot.   ( I tried making the spool using a solid middle, and was successful the first time.)

In the future,  if I am in a scrappy spool mood, I have another idea.  I plan to stabilize the center of the spool using a very lightweight fusible stabilizer.   I think this would eliminate my issues with the bias and stretchy seams.

I’m really looking forward to piecing my borders and sashing next.  I hope your spinning spools go smoother than mine did.   Never give up, even if they make your head spin!   They do turn out pretty.